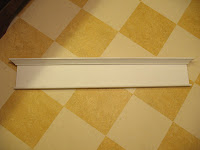
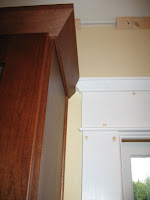
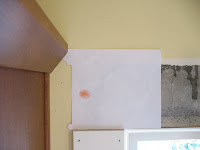
 I know it's not much, but with careful camera placement I was able to capture a shot that shows only finished surfaces.
Pages
Frank Lloyd Wright Quote
"Form follows function-that has been misunderstood. Form and function should be one, joined in a spiritual union"
Frank Lloyd Wright
Tuesday, August 21, 2007
Something Finished
 I know it's not much, but with careful camera placement I was able to capture a shot that shows only finished surfaces.
Sunday, August 19, 2007
Door and Base Trim Get Started
Today I started working on the door casings and the few spots in the kitchen that will need base trim.
 This is the corner between the door opening and the cabinets that needs about 12" of base trim. You can see that I've left the required 3/8" gap between the Marmoleum tiles and the wall. Here's a tip: when you're doing the drywall, don't think to yourself "Oh, the bottom few inches don't need to be perfect, it'll get covered by the base trim anyway." It needs to be perfect, otherwise your trim won't sit right and you'll have ugly gaps. I spent a few minutes with a rasp getting the bottom 6" perfect.
 Here is the trim mocked-up. I'm using 8" douglas fir base moulding and a simple profile on the cap moulding that matches the door and window lentils and goes well with the cabinet crown moulding. I applied 2 coats of primer before making any cuts to the raw lumber. Now that the cutting is done, I'll apply the first finish coat, install, fill gaps and nail holes, and the apply the final finish coat. Notice how I rounded the end of the white shoe moulding to give it a nice finished end. I also beveled the ends of the 8" boards where they meet the cabinets and the door casing because they stuck out about 1/16". I think the bevels will look OK once they're painted.
 Here's a look at how I assembled the doorway head casing before installing. I cut the head casing to be 1/4" wider than the installed side casings, and the parting bead to be 1" wider. When installed the bead will overhang the side casings by 1/2" on each side and the head casing will be 1/8" wider on each side. This assembly will get its first finish coat prior to being installed.
 This is the corner between the door opening and the cabinets that needs about 12" of base trim. You can see that I've left the required 3/8" gap between the Marmoleum tiles and the wall. Here's a tip: when you're doing the drywall, don't think to yourself "Oh, the bottom few inches don't need to be perfect, it'll get covered by the base trim anyway." It needs to be perfect, otherwise your trim won't sit right and you'll have ugly gaps. I spent a few minutes with a rasp getting the bottom 6" perfect.
 Here is the trim mocked-up. I'm using 8" douglas fir base moulding and a simple profile on the cap moulding that matches the door and window lentils and goes well with the cabinet crown moulding. I applied 2 coats of primer before making any cuts to the raw lumber. Now that the cutting is done, I'll apply the first finish coat, install, fill gaps and nail holes, and the apply the final finish coat. Notice how I rounded the end of the white shoe moulding to give it a nice finished end. I also beveled the ends of the 8" boards where they meet the cabinets and the door casing because they stuck out about 1/16". I think the bevels will look OK once they're painted.
 Here's a look at how I assembled the doorway head casing before installing. I cut the head casing to be 1/4" wider than the installed side casings, and the parting bead to be 1" wider. When installed the bead will overhang the side casings by 1/2" on each side and the head casing will be 1/8" wider on each side. This assembly will get its first finish coat prior to being installed.
Monday, August 13, 2007
Has Anyone Seen my Koi?
Saturday, August 11, 2007
Kitchen Window Progress
I need to keep reminding myself that just because I haven't finished a project doesn't mean I can't post an update. So here's an update on my almost completed kitchen windows.
 I have all of the trim in place and it even has the first topcoat of paint. Nail holes are filled and gaps are caulked. All that's left is to sand the wood filler and apply the final topcoat.

 I ran into one small snag while installing the head casing. Unfortunately, the windows weren't quite centered on the wall. They are offset by about 1" to the left of center. This meant the lentil for the windows needed to be trimmed asymmetrically. The pictures show how each side mates with the cabinet crown moulding.
 To trim the left end of the lentil I made a paper template by tracing the pre-assembled head casing onto regular typing paper. I then put the template in place and cut the paper to an exact fit. Then I put the paper back on the head casing assembly and marked where to cut. I was hoping for a nice snug fit, but my hand-sawing skills are a bit lacking, so I had to fill the gap with caulking. (Please don't tell anyone!)
 I have all of the trim in place and it even has the first topcoat of paint. Nail holes are filled and gaps are caulked. All that's left is to sand the wood filler and apply the final topcoat.
 I ran into one small snag while installing the head casing. Unfortunately, the windows weren't quite centered on the wall. They are offset by about 1" to the left of center. This meant the lentil for the windows needed to be trimmed asymmetrically. The pictures show how each side mates with the cabinet crown moulding.
 To trim the left end of the lentil I made a paper template by tracing the pre-assembled head casing onto regular typing paper. I then put the template in place and cut the paper to an exact fit. Then I put the paper back on the head casing assembly and marked where to cut. I was hoping for a nice snug fit, but my hand-sawing skills are a bit lacking, so I had to fill the gap with caulking. (Please don't tell anyone!)
Wednesday, August 8, 2007
Quick Tip: Kill the Grass in Your Sidewalk Cracks
 This one is so useful I can't believe I only learned about it a couple years ago. The easiest way to get rid of the grass and weeds growing in the cracks of your sidewalk is to boil-up a teapot of water. While it is still piping hot, take it outside and use it to water the grass you want dead.
The grass in this picture was vibrant an healthy just 3 days ago.
If you want faster results, use Dihydrogen Monoxide instead. ;-)
Subscribe to:
Posts (Atom)
Cooking WebsitesCategories
|
Portland HouseblogsBlogs I Like
FollowAbout Me |


